How to Install Nginx with Fast_CGI + Varnish Cache on AlmaLinux OS
Varnish Cache is an HTTP accelerator and reverse proxy specially designed for heavily loaded dynamic web sites as well as APIs. It acts as a middleman between your client and server. Varnish works by handling requests before they make it to your backend. If Varnish doesn’t have a request cached, it will forward the request to your backend and then cache its output.
This process dramatically increases the performance of your web server. Varnish is famously useful and is employed by many companies such as Wired, Urban Dictionary, Zappos, Technorati, DynDNS, OpenDNS, and many more. One of the key features of Varnish is the flexibility of its configuration language (VCL) which allows you to write policies on how incoming requests should be handled.
In this tutorial, we will learn how to set up Varnish caching with Nginx on CentOS 8. We will set up Nginx to listen on port 8080 and work as a backend server, then configure Varnish to listen on default HTTP port 80.
Prerequisites
- A fresh AlmaLinux OS VPS
- A root password configured on your server
Create a new, choosing CentOS 8 as the operating system with at least 1GB RAM. Connect to your Cloud Server via SSH and log in using the credentials highlighted at the top of the page.
Step 1 – Update OS & Install Required Packages
First, log in to your AlmaLinux Server with SSH.
Once you are logged in to your CentOS 8 server, run the following command to update your base system with the latest available packages.
dnf update -y
Step 2 – Install Varnish Cache
By default, the Varnish package is available in the CentOS 8 system. You can install it by just running the following command:
dnf install varnish -y
After installing Varnish, start the Varnish service and enable it to start after system reboot with the following command:
systemctl start varnish
systemctl enable varnish
Next, verify the status of Varnish with the following command:
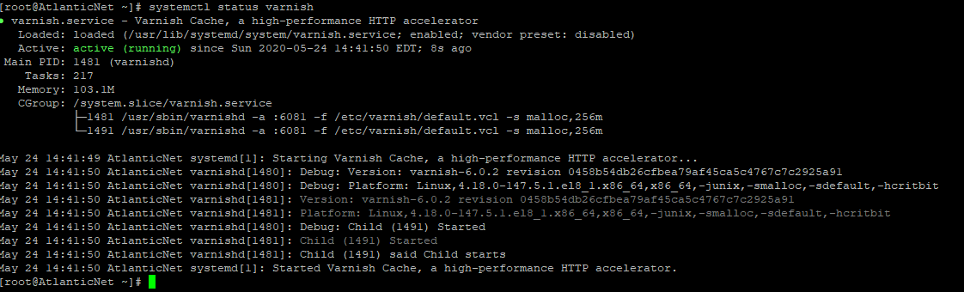
systemctl status varnish
You should get the following output:
By default, Varnish listens on port 6081. You can verify it using the following command:
netstat -ltnp | grep 6081
You should get the following output:
tcp        0      0 0.0.0.0:6081            0.0.0.0:*               LISTEN      1508/varnishd
tcp6       0      0 :::6081                 :::*                    LISTEN      1508/varnishd
Step 3 – Install and Configure Nginx
Next, you will need to install the Nginx web server and configure it to work with the Varnish cache.
First, install the Nginx server with the following command:
dnf install nginx -y
After installing the Nginx web server, you will need to change the Nginx web server listening port from 80 to 8080.
You can do it by editing the file /etc/nginx/nginx.conf.
nano /etc/nginx/nginx.conf
Find the following line:
listen       80 default_server;
listen       [::]:80 default_server;
And replace it with the following line:
listen       8080 default_server;
listen       [::]:8080 default_server;
Save and close the file, then start the Nginx service and enable it to start after system reboot:
systemctl start nginx
systemctl enable nginx
Note: If you are using virtual hosting, then configure the relevant configuration file.
Step 4 – Configure Varnish to Work with Nginx
By default, Varnish is configured to listen on port 6081, so you will need to configure it to listen on port 80. You can configure it by editing varnish.service configuration file:
nano /usr/lib/systemd/system/varnish.service
Find the following line:
ExecStart=/usr/sbin/varnishd -a :6081 -f /etc/varnish/default.vcl -s malloc,256m
And replace it with the following line:
ExecStart=/usr/sbin/varnishd -a :80 -f/etc/varnish/default.vcl -s malloc,256m

Save and close the file, then reload the systemd daemon with the following command:
systemctl daemon-reload
Next, restart the Varnish service to apply the changes:
systemctl restart varnish
Step 5 – Configure Nginx as a Backend Server for Varnish
Next, you will need to configure Nginx as a backend server for the Varnish proxy.
You can configure it by editing the file /etc/varnish/default.vcl:
nano /etc/varnish/default.vcl
Check to ensure the following lines are uncommented:
backend default {
    .host = "127.0.0.1";
    .port = "8080";
}
Save and close the file when you are finished.
Note: Change the line 127.0.0.1 with your Nginx server IP address if your Nginx server resides on the other host. Change the port 8080 with the port number of your Nginx server.
Step 6 – Verify Varnish Cache
At this point, the Varnish cache is configured to work with the Nginx webserver. It’s time to test whether caching is working or not.
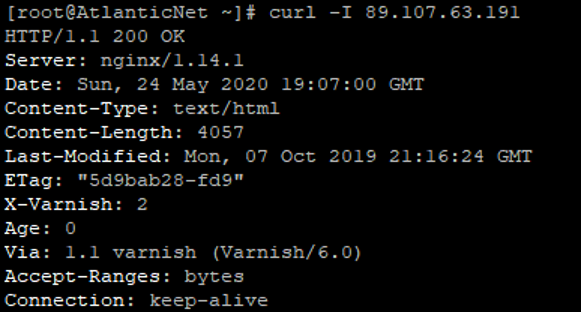
You can test it using the curl command:
curl -I http://your-server-ip
You should get the HTTP header information in the following output:
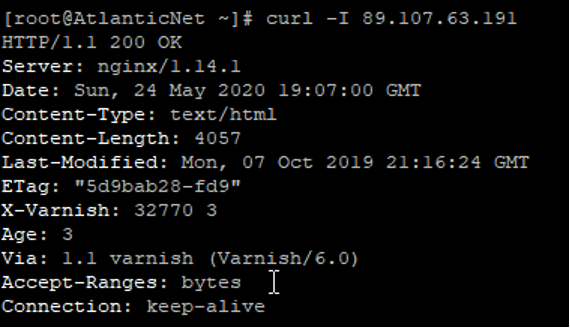
Next, run this command again:
curl -I http://your-server-ip
You should get the Varnish cached response in Age header (X-Varnish):
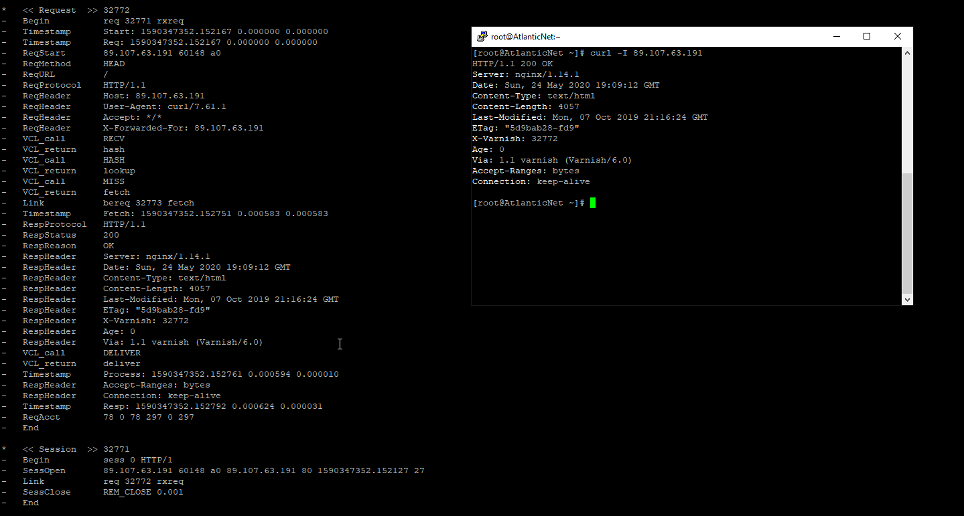
You can also test the Varnish cache using varnishlog command with curl command to view Varnish activity as it happens:
varnishlog
You should get the following output:
Conclusion
Congratulations! You have successfully installed and configured Varnish Cache with an Nginx web server on CentOS 8. Now your Nginx web server has a Varnish Cache server in front of it. You will need to add additional configuration to get the full benefit from it.